This forum is now read-only
To login to the new support channel and community forums, go to the Support Portal
Help with correct tools to loosen nuts on older Londinium
Help with correct tools to use with an older Londinium (2012-2016).
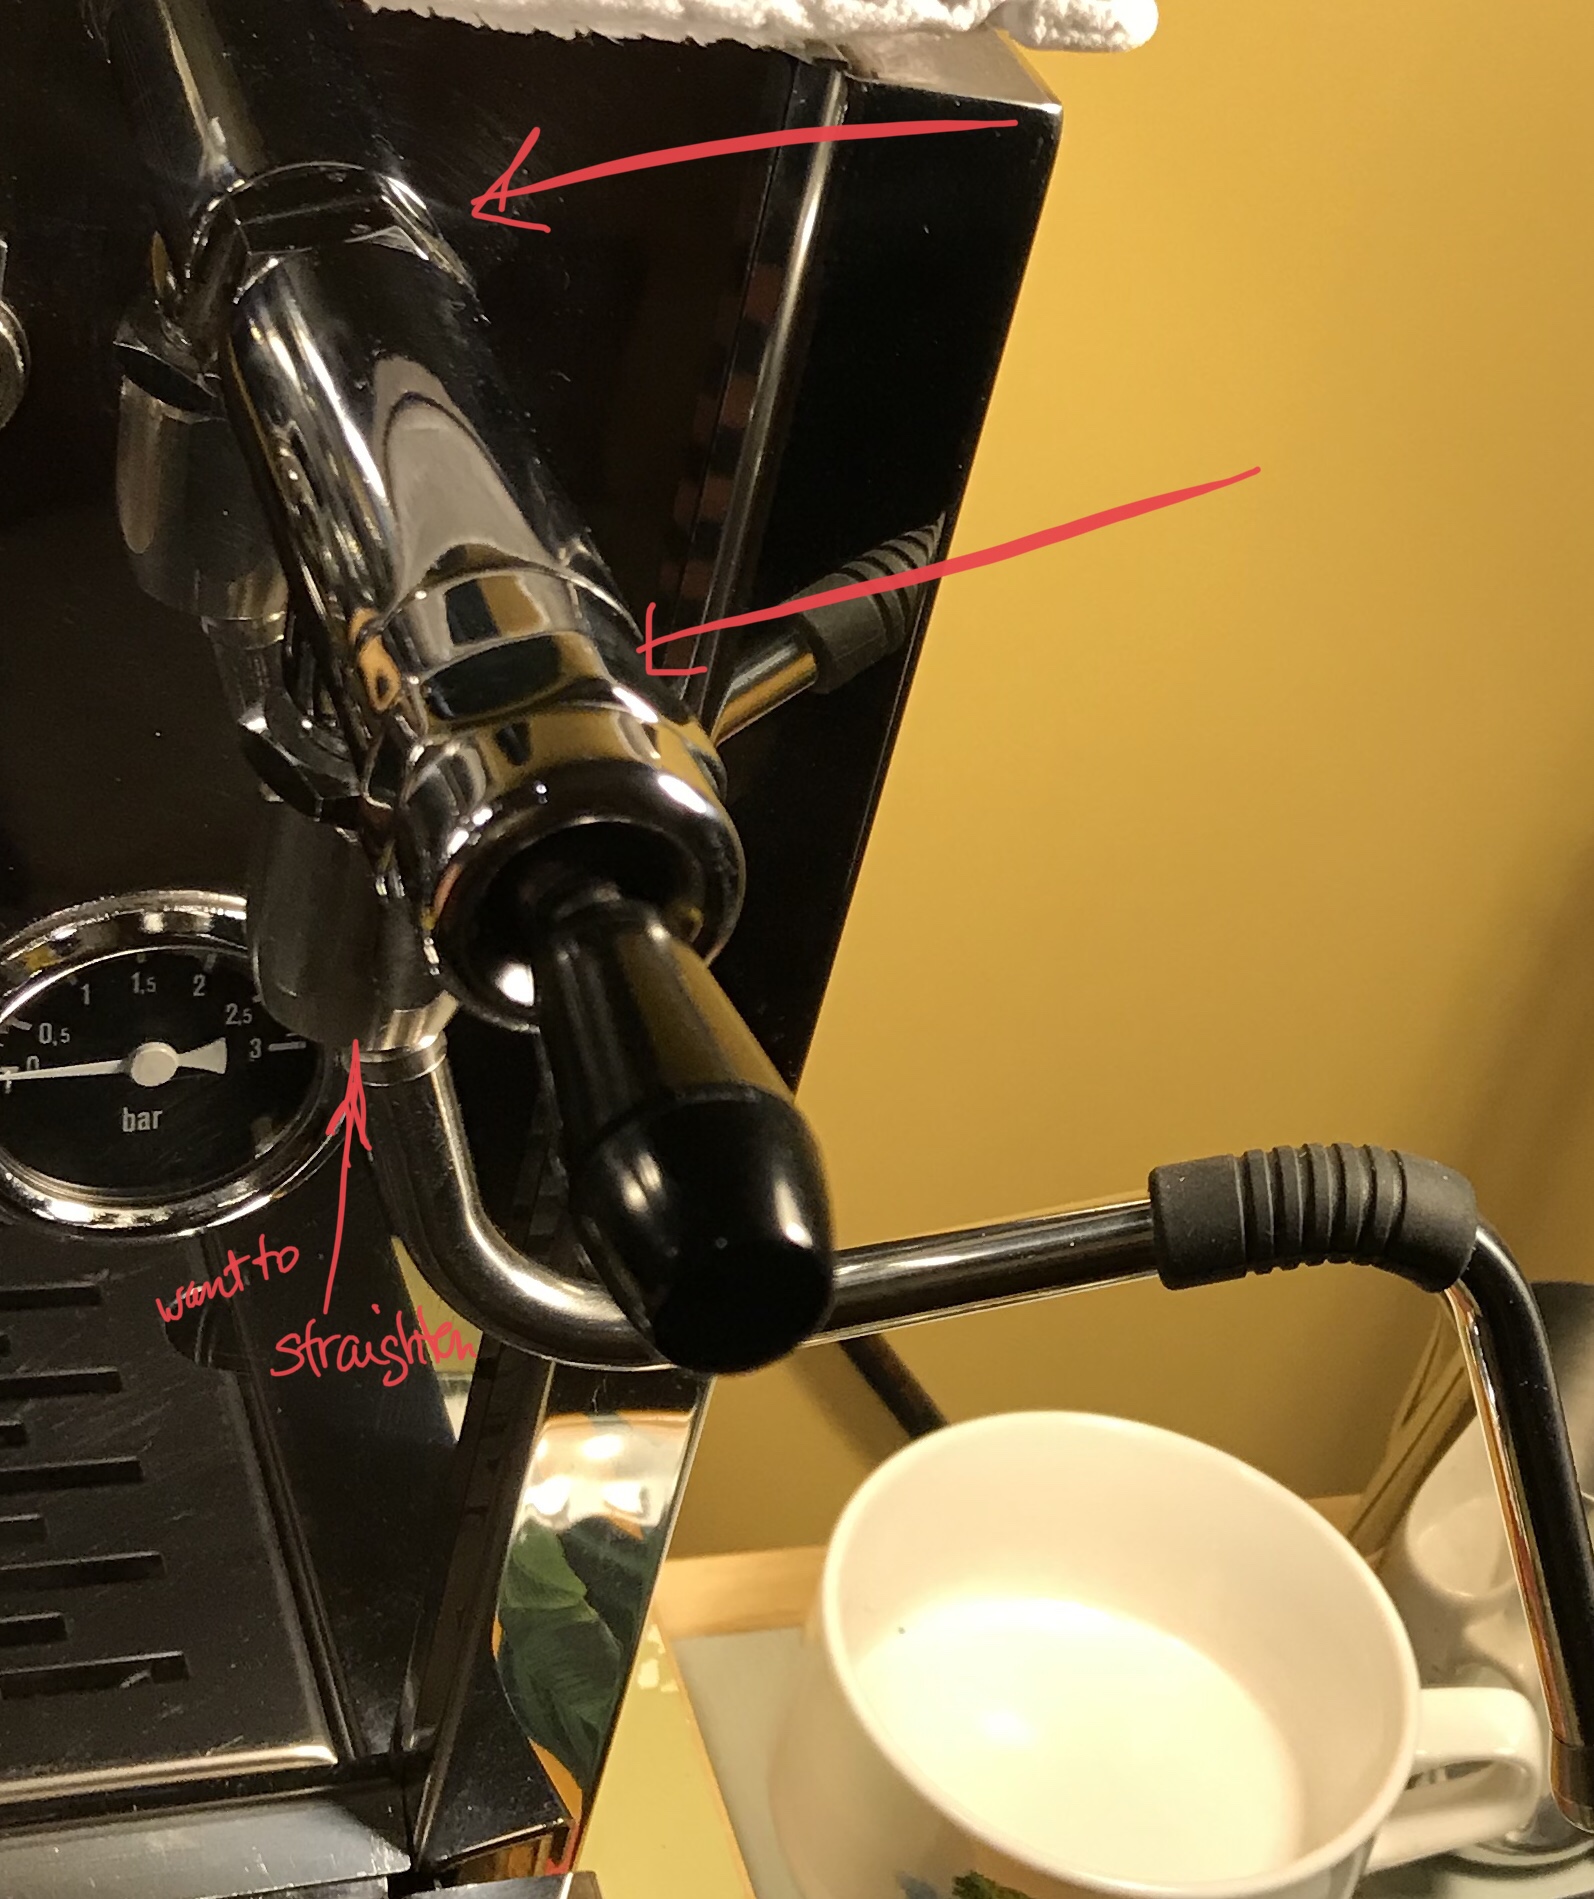
I am attempting to adjust the position of the head of the steam arm, from where it drops down at the main pipe. It is no longer falling straight down from that pipe, so the angle of the articulating steam arm is also a little bit off.
I’ve tried a basic wrench & protective electrical tape on the nuts at both the rear of the pipe (against the front panel) and the nut at the entrance to the steam toggle end. The wrench doesn’t budge the nut, it ends up slipping &/or rubbing through the tape + gripper cloth. If I forced it any further, it would end up marking the nuts.
Are there better tools or approaches for this task?
(picture attached)


Comments
yes, you need to loosen the nut on the back of the valve, which you will find inside the chassis
just ease the lock nut off fractionally, adjust the valve body so the 'T' junction is lying on the vertical axis then gently tighten the nut back up
you will of course net to hold the valve body in place as you tighten the nut or it will rotate out of position on you as you tighten up the nut
kind regards
reiss.
Are there specialized tools and protective tape to prevent scratching the exposed stainless steel nuts on the outside of the chassis? (I’d be wise to upgrade my basic wrench & plastic tape, if there are indeed better choices for those areas? I searched google & saw a “strap wrench”; it looks like an unlikely candidate, but perhaps is worth a try?) Worse case scenario, the nuts would be replaceable, I suppose.
for the problem you have you will only be affixing a wrench to the nut on the inside of the front panel and you will be holding the valve in the correct position to stop it twisting with your free hand as you tighten the nut on the inside with the wrench; i cant envisage any opportunity to scratch anything
if you were taking the valve apart, then yes the opportunity to scratch the chrome on the valve exists, or worse the mirror polished stainless of the front panel
you can reduce this risk by using set wrenches rather than adjustables and placing a thin piece of cloth between the chrome valve and the wrench
using a set wrench also removes the opportunity to crush the end cap on the valve which is made from quite thin brass, which is soft
kind regards
reiss.
https://vimeo.com/259787247
Got it!
Happy to help. Enjoy!